
Flowers
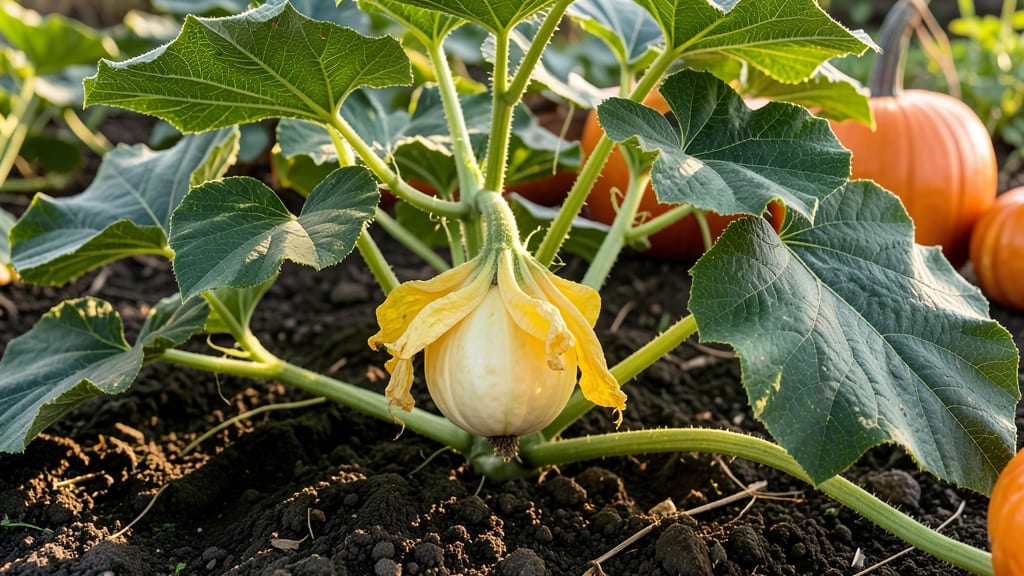
When your female pumpkin flower 🎃 wilts after pollination, you might assume the worst—but that droop is actually a good sign! The ovary at its base is hard at work transforming into a pumpkin, and understanding this process is the key to maximizing your harvest.
This stage can feel confusing, especially if you’re new to growing pumpkins. The flower wilting is completely normal as nutrients shift to the developing fruit, but there are still ways to ensure strong fruit set.
Whether you're dealing with 6a zone conditions or just curious about what happens next, knowing these steps will help you boost your garden’s success.
From recognizing successful pollination to supporting healthy fruit development, I’ll walk you through every detail. You’ll learn how to spot signs of a thriving pumpkin, avoid common pitfalls like blossom end rot, and even troubleshoot issues before they derail your harvest.
Let’s turn that wilted flower into a bounty of pumpkins!
Ready to go from pollination to harvest with confidence? The next steps are simpler than you think—and they start right here. Let’s dive in and make sure your pumpkins grow bigger and stronger than ever.
What happens to a female pumpkin flower after successful pollination
When you spot a female pumpkin flower wilt just after pollination, it’s not a sign of failure—it’s nature’s way of redirecting energy. The flower’s petals begin to droop and fall off within 24-48 hours, but this is crucial for fruit development.
The ovary at the base of the flower, where the pumpkin will grow, starts transforming almost immediately after fertilization. This process is your first clue that pollination worked!
The withering petals expose the tiny ovary, which will swell and harden into a pumpkin fruit over the next few weeks. During this stage, the plant prioritizes nutrient and water flow to the developing fruit, often at the expense of new flower growth.
This is why you might notice fewer blooms after successful pollination—your pumpkin plant is investing in fruit production instead.
| Stage | Visual Changes | Timeframe | What’s Happening |
|---|---|---|---|
| Immediate (0-2 days) | Petals wilt and fall | 24-48 hours | Ovary begins swelling |
| Early Development (3-7 days) | Small bump forms at base | 3-7 days | Cell division accelerates |
| Rapid Growth (8-21 days) | Fruit swells visibly | 2-3 weeks | Nutrients shift to fruit |
| Maturation (22-90+ days) | Rind hardens, color deepens | 6-12 weeks | Fruit reaches harvest size |
The ovary transformation begins within hours of pollination, but the most visible changes occur in the first week. Look for a small, marble-sized bump where the flower once was.
This bump will grow rapidly if the plant has sufficient water and nutrients. During this phase, the fruit’s skin will soften slightly before hardening as it matures.
One of the most reliable signs of successful pollination is the presence of a tiny stem (called the "peduncle") connecting the fruit to the vine. This stem will thicken as the pumpkin grows.
If you notice the fruit shriveling or dropping off within the first week, it may indicate failed fertilization or environmental stress like extreme heat or drought.
Temperature plays a critical role in post-pollination development. Ideal conditions for pumpkin fruit set are between 70-85°F (21-29°C). If temperatures drop below 55°F (13°C) or rise above 95°F (35°C), the ovary may fail to develop properly.
This is why morning pollination—when temperatures are cooler—often yields better results in hot climates.
Within 10-14 days after pollination, you should see the fruit’s shape become more defined. The color will shift from pale green to deeper green or the variety’s mature hue (e.g., orange for Jack-o'-Lanterns).
At this stage, the fruit is highly sensitive to nutrient deficiencies, so ensure your pumpkins receive a balanced fertilizer with potassium and phosphorus to support cell growth.
By 3-4 weeks, the pumpkin’s rind will begin to harden, a sign that the fruit is nearing maturity. However, don’t confuse this with readiness for harvest—most pumpkins need 75-120 days total to reach full size.
During this time, monitor for blossom end rot (a calcium deficiency causing dark spots) and address it immediately with calcium-rich amendments like crushed eggshells.
If you’re growing heirloom or large varieties, you might need to thin fruits to 2-3 per vine to prevent overburdening the plant. Removing excess pumpkins early ensures the remaining fruits receive adequate water, sunlight, and nutrients, leading to higher-quality harvests.
Always use clean, sharp pruners to avoid damaging the vine.
One common misconception is that a wilted female flower means pollination failed. In reality, wilting is a normal part of the process—unless the ovary doesn’t swell within a week. Keep an eye on your pumpkin plants for new female flowers, as each successful pollination can lead to another fruit.
With the right care, your garden can become a pumpkin-producing machine!
5 Proven ways to boost pumpkin fruit set after pollination
Seeing that female pumpkin flower wilt after pollination is your first sign that fruit development has begun—but it’s also your cue to take action.
The ovary at the flower’s base is now working overtime to form your pumpkin, and giving it the right support can mean the difference between a small harvest and a bountiful yield. Here’s how to optimize this critical stage with science-backed techniques.
First, focus on hand-pollination if your garden lacks natural pollinators. Use a small paintbrush to transfer pollen from male flowers (with long stems) to the female flowers (with tiny pumpkins at their base).
Do this on cool mornings when flowers are fully open for best results. This step alone can double your fruit set in 6a zone gardens where bees are scarce.
- ✅ Hand-pollinate female flowers with pollen from male flowers using a paintbrush on cool mornings.
- ✅ Maintain 70-80°F soil temps—use black plastic mulch to warm roots if nights dip below 60°F.
- ✅ Prune excess vines to redirect energy to developing fruit—remove runners with no flowers.
- ✅ Apply compost tea or fish emulsion every 2 weeks to boost calcium and phosphorus for ovary growth.
- ✅ Thin fruits to 3-4 per vine—larger pumpkins develop when the plant isn’t overburdened.
Next, pay close attention to temperature and humidity. Pumpkin ovaries struggle to develop when soil temperatures drop below 60°F at night. Use black plastic mulch to absorb heat and keep roots warm.
If humidity is too high, the flowers may rot before pollination occurs—ensure good airflow around vines by spacing them 4-6 feet apart.
Don’t overlook the power of pruning and thinning. Once you see small pumpkins forming, remove any weak or deformed fruits to focus the plant’s energy.
Aim to leave only 3-4 healthy pumpkins per vine—this prevents overcrowding and ensures each fruit gets the nutrients it needs to reach its full size.
For an extra boost, feed your pumpkins with organic supplements rich in calcium and phosphorus. A compost tea or fish emulsion applied every 2 weeks strengthens cell walls in the developing fruit, reducing the risk of blossom end rot.
Mix 1 tablespoon of fish emulsion per gallon of water and apply it directly to the soil around the vines.
Finally, monitor for pests and diseases that can derail fruit development. Squash vine borers and powdery mildew are common threats—use neem oil or row covers to protect young plants.
If you notice wilting or yellowing leaves, act fast to save your developing pumpkins. With these steps, you’ll go from pollinated flower to plump pumpkin in no time!