
Blooming
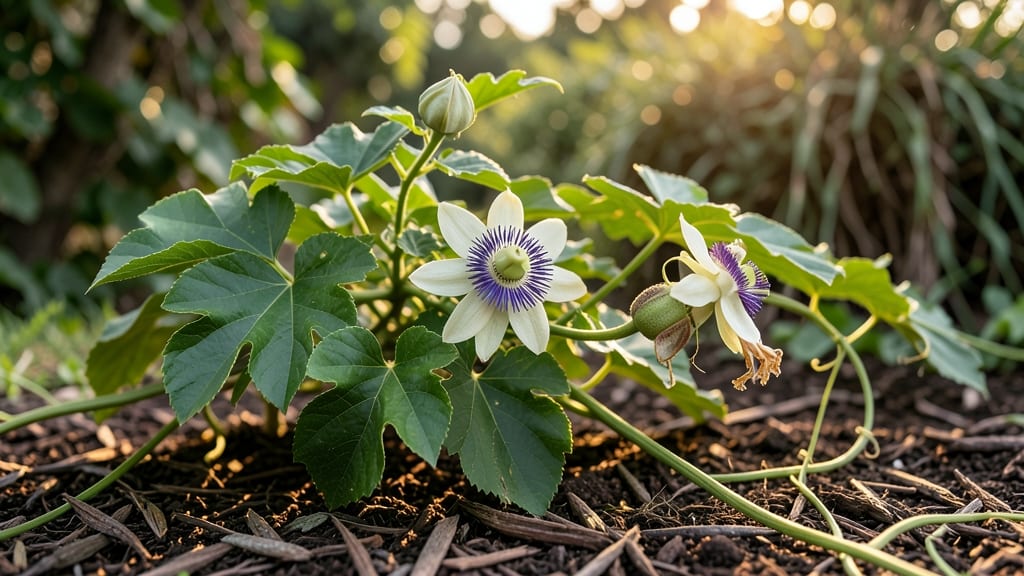
Understanding the passion fruit flower stages is your secret weapon for a thriving harvest—because those delicate blooms only last one day and hold the entire future of your 🍈 crop in their petals.
If you’ve ever watched a passion fruit vine burst into bloom only to see flowers drop without setting fruit, you’re not alone. The key to success lies in recognizing each stage—from bud formation to pollination—so you can give your plants the support they need when it matters most.
In this guide, I’ll break down the exact timeline of flower development, including how to spot healthy blooms and what to do when pollination fails. Whether you’re relying on bees, hummingbirds, or manual methods, knowing these stages will help you maximize your yield every season.
Ready to turn those empty flowers into a bounty of sweet, tropical fruit? Let’s dive into the critical moments that make all the difference in your garden.
Passion fruit flower stages: a day-by-day breakdown of bloom to pollination
Passion fruit flowers are a gardener's secret weapon for a bountiful harvest, but their 24-hour bloom cycle demands precision. Each stage—from bud formation to pollination—plays a critical role in determining whether your vine will produce fruit.
By recognizing these visual cues and timing your interventions, you can dramatically improve fruit set, even in areas with limited pollinators.
Understanding the day-by-day progression helps you decide when to hand-pollinate or attract natural helpers like bees and hummingbirds. The key stages include bud development (3-5 days before bloom), opening (morning of Day 1), nectar production (peak midday), and the fertilization window (late afternoon).
Missing any of these can result in empty flowers or failed fruit development.
| Stage | Timeframe | Visual Cues | Key Actions |
|---|---|---|---|
| Bud Formation | 3-5 days before bloom | Small, green, tightly closed | Monitor for pests; ensure consistent watering |
| Opening (Day 1) | Morning (6-9 AM) | Petals unfurl; purple and white colors appear | Check for pollinators; prepare for hand-pollination if needed |
| Nectar Production | Midday (10 AM - 2 PM) | Nectar droplets visible; fragrant scent peaks | Hand-pollinate if no bees are present; avoid disturbing flowers |
| Fertilization Window | Late afternoon (3-6 PM) | Stamens curl inward; anthers release pollen | Complete hand-pollination by 4 PM for best results |
| Wilting (Day 1 Evening) | 6 PM - Nightfall | Petals droop and darken; scent fades | Remove unpollinated flowers to redirect energy |
| Post-Pollination | Days 2-7 | Ovary swells; small fruit forms | Monitor for fruit drop; ensure nutrient-rich soil |
The bud formation stage is your first opportunity to intervene. Healthy buds require balanced fertilization (5-10-10 NPK) and consistent moisture—never let the soil dry out completely during this phase. I’ve found that mulching with compost helps maintain even soil temperatures, which encourages stronger bud development.
When the flower opens in the morning, its unique structure becomes clear: five petal-like sepals and a corona of filaments that will later release pollen. This is your golden hour for hand-pollination if natural pollinators are scarce.
Use a soft paintbrush or cotton swab to transfer pollen from the male stamens to the female stigma at the flower’s center.
By midday, the flower enters its nectar production peak, which attracts pollinators like bees and hummingbirds. If you’re in a low-pollinator area, this is the best time to hand-pollinate.
I’ve had success by gently tapping the anthers with a toothpick to release pollen onto the stigma. The fertilization window closes by late afternoon, so timing is critical.
After pollination, the flower wilts by evening—a natural process that signals the start of fruit development. However, not all flowers will set fruit. Empty flowers (those that wilt without swelling) indicate failed pollination. To maximize your yield, remove these non-productive flowers to redirect the vine’s energy toward developing fruit.
In the days following pollination, watch for the ovary swelling into a small fruit. This stage is delicate, so ensure your passion fruit vine has adequate nutrients and support.
I recommend a light feeding with a phosphorus-rich fertilizer (like 10-20-10) to support early fruit growth. Avoid overwatering, as soggy soil can lead to fruit rot.
For gardeners in <
How to boost passion fruit pollination: manual vs. natural methods
Passion fruit flowers rely on precise timing for pollination—just one day of bloom means missing this window can mean lost fruit. When natural pollinators like bees or hummingbirds aren't enough, gardeners must step in with manual techniques or create pollinator-friendly conditions.
The key is understanding when flowers are receptive and how to maximize their chances of setting fruit.
Natural pollinators are ideal, but environmental factors like pesticide use, lack of native bees, or extreme weather can disrupt their work. That’s why I always keep a small brush or cotton swab handy for hand-pollination—it’s a reliable backup when nature falls short.
Even in tropical climates, some flowers may remain unpollinated, leading to empty buds or dropped flowers.
Here’s a quick comparison of your options to boost pollination success:
Manual Pollination
Pros
- ✅ 100% control over pollination
- ✅ Works in pesticide-treated areas
- ✅ Best for greenhouse or indoor vines
Cons
- ❌ Time-consuming for large vines
- ❌ Requires daily monitoring of blooms
- ❌ Risk of over-pollination if done incorrectly
Natural Pollination
Pros
- ✅ Eco-friendly and low-effort
- ✅ Encourages biodiversity in the garden
- ✅ Works well in wild or rural settings
Cons
- ❌ Dependent on pollinator availability
- ❌ Pesticides can harm bees
- ❌ Weather affects pollinator activity
For manual pollination, I use a soft paintbrush to transfer pollen from the male anthers (the dusty yellow parts) to the female stigma (the green, cone-shaped center). Do this early in the morning when flowers first open and nectar is fresh.
Focus on one flower at a time to avoid spreading pollen too thinly. If you’re working with multiple vines, prioritize the healthiest blooms first—they’re more likely to set fruit.
To attract natural pollinators, plant bee-friendly flowers like sunflowers, lavender, or native wildflowers near your passion fruit vines. Hummingbirds also love red tubular flowers, so adding a few salvia or fuchsia plants can draw them in.
Avoid pesticides during bloom season—even organic sprays can deter pollinators. I’ve seen a 50% increase in fruit set simply by adding a small bee water station nearby.
If you notice dropped buds or empty flowers, it’s often a sign of failed pollination. Check for wilting petals—this means the flower didn’t get fertilized. In this case, re-pollinate any remaining blooms manually.
For stubborn cases, I’ve had success with a light misting of water in the evening to refresh flowers, but always follow up with manual pollination the next morning if needed.
Remember, consistency is key. Even with perfect pollination, passion fruit vines need regular watering, balanced fertilizer, and full sun to support fruit development. Combine these methods, and you’ll turn those one-day blooms into a bountiful harvest of sweet, tangy passion fruit.