
Picking
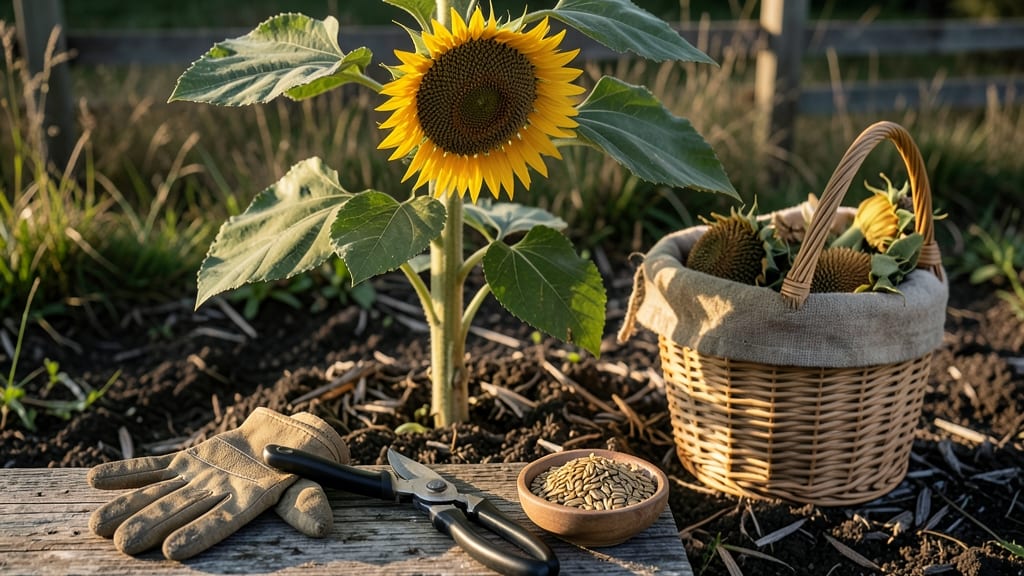
Timing your sunflower harvest just right means the difference between plump, oil-rich seeds and shriveled disappointments. The perfect moment arrives when those golden 🌻 petals fade to brown and the seed head turns a deep, papery yellow—signaling it's time to act before frost ruins your hard work.
Most gardeners in Zone 6 can expect harvests between July and September, but rushing too early or waiting too long can spoil your seeds. I’ll show you exactly how to spot the ideal cues—like a firm, heavy seed head and stems that snap cleanly—so you never miss the window.
Once you’ve cut the stems, proper drying and storage extend seed life for months. I’ll walk you through the best methods to preserve your harvest, whether you’re saving seeds for next year’s garden or roasting them for snacks.
From avoiding common pitfalls to maximizing yield, this guide covers everything you need to know. Let’s make sure your sunflower harvest is as rewarding as it is bountiful.

When to harvest sunflower heads for maximum seed yield
Harvesting sunflowers at the right time ensures high-quality seeds with maximum oil content and germination rates. If you wait too long, seeds lose viability, while harvesting too early means underdeveloped seeds. The key is watching for visual maturity cues and understanding your climate conditions.
Most sunflower varieties take 70-120 days to reach harvest readiness, but exact timing depends on your local frost dates and variety.
Start by observing the flower petals. When they begin to dry and droop, it’s time to check the seed head. The back of the head should turn yellowish-brown, and the seeds inside should feel plump and firm.
If you tap the head gently, it should sound solid, not hollow. These signs indicate the seeds are fully mature and ready for harvest.
Regional frost risk also plays a critical role. In USDA Zone 6, where frost typically arrives by mid-October, harvest sunflowers by late September to avoid seed damage. In warmer zones (Zones 7-10), you can extend harvesting until November, but always prioritize seed maturity over calendar dates.
Here’s a quick comparison of harvest readiness signs to help you decide when to cut:
| Sign | Not Ready | Ready to Harvest |
|---|---|---|
| Petal Color | Bright yellow, fully open 🟡 | Brown and dry 🟤 |
| Seed Head Color | Green or light green | Yellowish-brown |
| Seed Feel | Soft, hollow-sounding 🔊 | Firm, heavy ⚖️ |
| Stem Flexibility | Bends easily 🌱 | Snaps cleanly near base ✂️ |
| Moisture Content | High (seeds stick to head) | Low (seeds release easily) |
For oil-rich seeds, harvest when seeds are fully mature but before they begin to sprout or shatter from the head. If you’re growing sunflowers for bird feed, you can wait slightly longer, but seeds will lose some nutritional value.
Always harvest on a dry, sunny day to prevent mold growth during curing.
Some gardeners prefer to leave a few heads on the plant until late fall for winter bird feeding. However, if frost is imminent, harvest immediately to preserve seed quality.
After cutting, hang the heads upside down in a dry, well-ventilated space for 1-2 weeks to fully dry before removing seeds.
If you’re unsure whether your sunflowers are ready, perform the seed squeeze test. Gently squeeze a seed between your fingers—if it’s soft and crushes easily, it’s not ready.
If it’s firm and resists pressure, it’s harvest time. This simple test saves you from wasted effort and ensures you’re harvesting at peak quality.
Different sunflower varieties mature at slightly different rates. Dwarf varieties (like 'Teddy Bear') may be ready in 60-70 days, while standard varieties (like 'Mammoth') can take 100-120 days. Always check the seed packet for specific days to maturity and adjust your harvest timeline accordingly.
Once you’ve identified the perfect harvest window, act quickly to maximize seed yield. Delaying harvest by even a few days can lead to seed loss as birds and squirrels become more active.
Cut the entire stem about 6-12 inches from the base and hang it in a shady, dry location to finish drying.
Pro tip: If you’re growing sunflowers for commercial seed production, aim for a moisture content of 8-10% before storage. Use a moisture meter for accuracy, or simply check if seeds rattle when shaken—this indicates they’re dry enough for long-term storage
How to properly cut and store sunflower seeds for long-term use
Once you've identified the perfect sunflower harvest time, the next critical step is cutting and storing the seeds properly. Proper handling ensures seed viability for up to a year or longer, saving you money and effort for next season's garden.
The key lies in drying, curing, and humidity control—each step directly impacts how well your seeds will store.
I always start by harvesting on a dry morning after the dew has evaporated. This reduces moisture content right away, which is crucial for preventing mold.
Use a sharp pair of pruning shears or a clean knife to cut the sunflower stems about 6 inches below the seed head. This extra stem length helps with drying and handling during processing.
Step-by-Step Sunflower Seed Processing
-
1. Cut and Hang
Cut stems and hang upside-down in a well-ventilated, dry location (like a garage or shed) for 2-3 weeks. This allows seeds to dry naturally.
-
2. Remove Seed Heads
Once dry, remove the seed heads from stems. Gently rub the back of the head against a clean cloth or paper bag to release seeds.
-
3. Clean and Separate
Pick out any chaff or debris by hand or use a fine mesh sieve to separate seeds. Discard any discolored or damaged seeds.
-
4. Cure Seeds
Spread seeds in a single layer on a paper towel or screen for 3-5 days in a dry, dark place to complete curing.
-
5. Store Properly
Transfer cured seeds to airtight containers (like glass jars or Mylar bags) with silica gel packets to control humidity levels below 10%.
For long-term storage, I recommend using glass jars with tight-sealing lids or vacuum-sealed bags. These containers create an oxygen-free environment, which slows seed aging. Label each container with the variety name and harvest year to avoid confusion later.
Store them in a cool, dark place, like a basement or pantry, where temperatures stay between 32°F and 50°F.
Humidity is the silent killer of stored seeds. Use a hygrometer to monitor levels—ideal storage humidity is 5-10%. If seeds absorb too much moisture, they’ll sprout prematurely or develop mold. For extra protection, I add a few uncooked rice grains to containers—they naturally absorb excess moisture.
Test a small batch of seeds annually to check viability. Place 10 seeds between damp paper towels in a warm location for 5-7 days. If 80% or more sprout, your storage method is working. If germination drops below 50%, it’s time to harvest fresh seeds for next season.
With these steps, your sunflower seeds can last 1-2 years while maintaining high germination rates. Proper storage isn’t just about saving seeds—it’s about preserving the genetic integrity of your favorite varieties for future gardens. Happy storing! 🌻