
Flowers
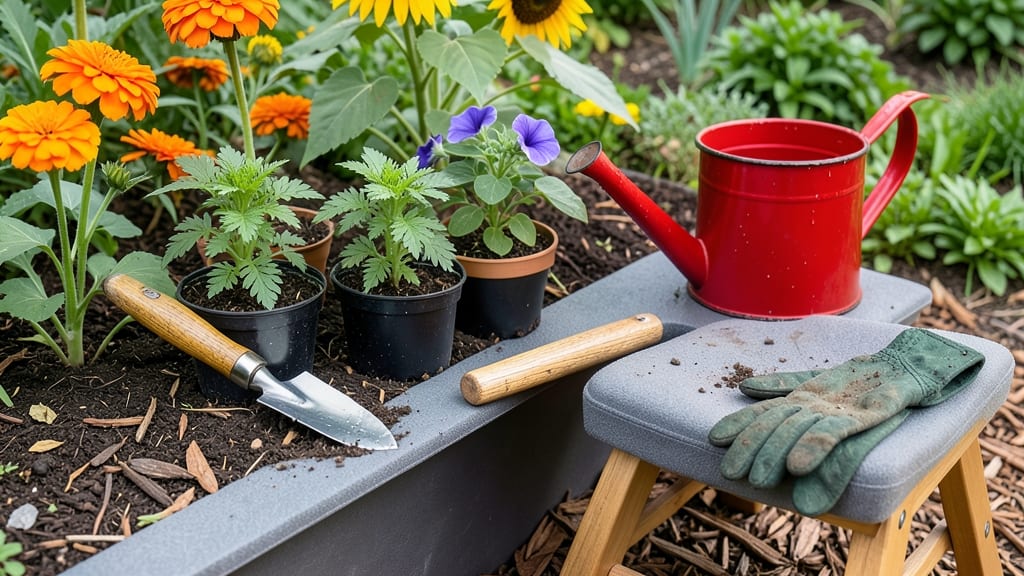
Planting flowers in the ground might seem simple, but getting them to thrive starts with the right technique—and most gardeners miss the key steps that make all the difference.
Whether you're filling a sunny border or a shady corner, the foundation you build today determines how vibrant your 🌸 blooms will be next season.
I’ve learned the hard way that rushing the prep work leads to weak roots and sparse flowers. The secret isn’t just digging a hole—it’s about loosening the soil, amending it with compost, and spacing plants just right for airflow.
Skip these steps, and even the hardiest flowers will struggle to take hold.
In this guide, I’ll walk you through the exact process I use to plant flowers that come back stronger year after year. You’ll discover how to test your soil, choose the perfect spot, and avoid common mistakes that kill plants before they even bloom.
Let’s get those roots growing the right way.
By the end, you’ll have a garden that doesn’t just survive but thrives—with fuller blooms, healthier plants, and less guesswork. Ready to turn your flower bed into a showstopper? Let’s dig in.

Step-by-Step guide to planting flowers in the ground for maximum growth
Planting flowers in the ground can transform your yard into a vibrant oasis—but only if you follow the right techniques. The key to success lies in selecting the perfect location, preparing the soil, and planting with precision.
Whether you're working with annuals, perennials, or bulbs, these steps will help your flowers establish strong roots and thrive for seasons to come.
Many gardeners make the mistake of rushing the planting process, but taking time to prepare the soil and space plants correctly pays off with healthier, more resilient blooms.
I’ve planted everything from delicate petunias to hardy daylilies, and I’ve learned that even small details—like planting depth and watering schedules—can make a huge difference in growth.
🌱 Step-by-Step Planting Guide
- 📍 Step 1: Choose the Right Location
- Select a spot with 6+ hours of sunlight for most flowers (check plant tags for exceptions).
- Avoid low-lying areas where water pools after rain.
- 🌿 Step 2: Test and Prepare the Soil
- Use a soil test kit to check pH (most flowers prefer 6.0–7.0).
- Loosen soil to a 12-inch depth with a garden fork or tiller.
- Mix in 2–3 inches of compost or aged manure for nutrients.
- 📏 Step 3: Space Plants Correctly
- Check plant tags for mature spacing (e.g., 12–18 inches apart for most annuals).
- Group tall flowers at the back, medium-height in the middle, and short flowers in front.
- 🌱 Step 4: Dig the Hole and Plant
- Dig a hole twice as wide as the root ball but no deeper.
- Gently remove the plant from its container and loosen roots if pot-bound.
- Place the plant so the top of the root ball sits level with the soil (not buried).
- 💧 Step 5: Water Thoroughly
- Water deeply to settle the soil and eliminate air pockets.
- Apply 1–2 inches of mulch around the base to retain moisture.
- 🌡️ Step 6: Adjust for Season
- Spring planting: Wait until after the last frost date (typically mid-April in Zone 6a).
- Fall planting: Plant 6–8 weeks before first frost for perennials.
One of the biggest mistakes I see is planting too deep, which can suffocate roots and lead to rot. Always keep the root ball slightly above ground level—this ensures the plant gets the oxygen it needs to thrive.
For bulbs like tulips, plant them at a depth equal to 3x their height for optimal growth.
After planting, monitor your flowers closely for the first few weeks. Yellowing leaves can signal overwatering, while wilting may mean the soil is too dry. Adjust your watering schedule based on weather conditions—daily watering in summer heat versus every few days in cooler months.
For annuals like marigolds, you’ll want to replant them every year after they fade, while perennials like coneflowers will return year after year with proper care. Mulching around your plants not only conserves water but also suppresses weeds, giving your flowers a competitive edge.
Seasonal timing is critical. In Zone 6a, I always plant spring-blooming bulbs like daffodils in fall (September–October) so they establish roots before winter. Meanwhile, summer annuals like zinnias can go straight into the ground after the last frost in April or May.
Pro tip: If you’re planting multiple varieties, create a simple sketch of your garden layout beforehand. This helps you visualize how flowers will fill in over time and prevents overcrowding.
Over time, you’ll develop an eye for which plants thrive together—like pairing lavender with roses for a fragrant, low-maintenance combo.
With these steps, your flowers will establish strong roots, bloom abundantly, and bring color to your garden for years to come. Happy planting! 🌷
Soil preparation secrets: how to create the perfect flower-bed foundation
The foundation of every thriving flower bed starts with your soil. I’ve seen weak, struggling plants transformed simply by improving the growing medium. Before you plant a single seedling, invest time in testing and amending your soil—it’s the difference between sparse blooms and a lush, vibrant garden.
Most garden centers sell affordable soil test kits that reveal pH levels and nutrient deficiencies in just minutes.
Start by removing all weeds and debris from your flower bed area. Use a garden fork to loosen compacted soil to a depth of 12-18 inches. This improves root penetration and water absorption.
If your soil feels heavy or clay-like, it needs organic matter to lighten it up. My go-to amendment is well-aged compost, which adds nutrients while improving drainage and moisture retention.
Here’s where most gardeners make mistakes: they skip the pH test. Most flowers prefer a slightly acidic to neutral pH between 6.0 and 7.0. If your test shows different results, you’ll need to adjust it.
For acid-loving flowers like hydrangeas or azaleas, add sulfur or peat moss. For alkaline soils, incorporate lime or wood ash. Always amend gradually—you can’t reverse overcorrection.
| Soil Type | Ideal Mix | Best For | Drainage |
|---|---|---|---|
| Sun-Loving Mix | 60% garden soil, 30% compost, 10% perlite | Daylilies, Marigolds, Black-Eyed Susans | Fast-draining |
| Shade-Tolerant Mix | 50% garden soil, 40% compost, 10% peat moss | Impatiens, Bleeding Heart, Hostas | Moisture-retentive |
| Heavy Clay Soil Fix | 40% garden soil, 40% compost, 20% coarse sand | All flowers in clay areas | Improved drainage |
After amending, mix everything thoroughly with your existing soil. For flower beds, aim for a loose, crumbly texture that holds moisture without becoming soggy. If your area has poor drainage, consider creating a raised bed or adding a sand layer at the bottom.
I’ve seen root rot destroy entire plantings because water pooled instead of draining.
Don’t forget to mulch! A 2-3 inch layer of organic mulch like shredded bark or straw helps retain moisture, suppress weeds, and regulate soil temperature. I apply mulch after planting and replenish it seasonally.
For sun-loving flowers, use lighter mulches like pine straw. For shade plants, darker mulches like composted leaves work better.
Finally, give your soil a 2-4 week settling period before planting. This allows amendments to integrate fully and prevents nutrient runoff. Test your soil again after this period to confirm your adjustments worked.
With the right foundation, your flowers will establish roots quickly and reward you with longer blooming seasons and healthier growth. 🌱